Now that we have learned some basics in creating a website with Elementor, we will move on to some steps that are a little more complex.
We will show you how to insert some more widgets on the website.
How to share your page on social networks
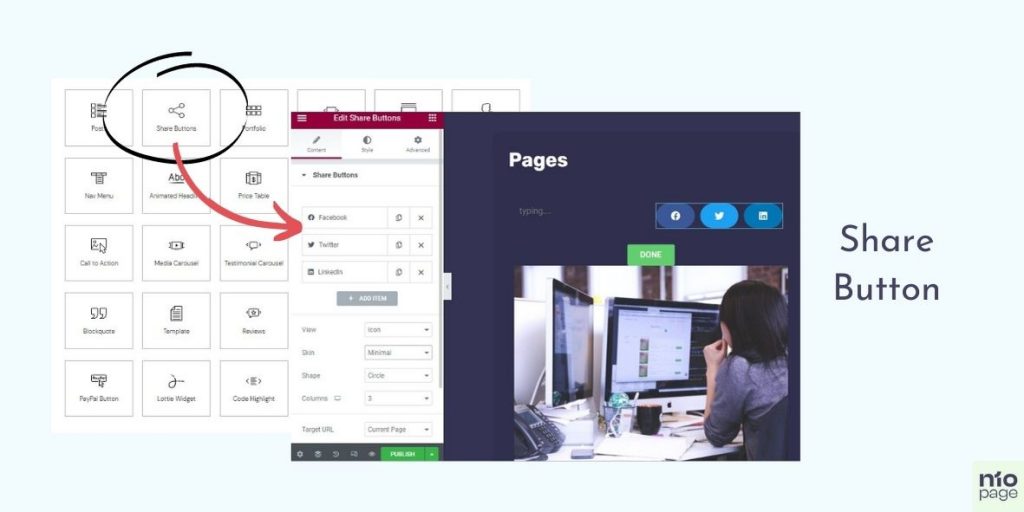
You will select the Share Button from the offer, and you will drag the widget to the desired location and drop it.
You have the option to choose which social networks you want to enable sharing, whether it is Facebook, LinkedIn, Twitter, or maybe WhatsApp or simple Email.
Once you choose how many sharing buttons you want to have, you continue to choose the design of those buttons. Whether the name will be written on them or just the logo, whether they will be rounded or square, filled with color or not, it all depends on your wishes.
How to insert CTA Button
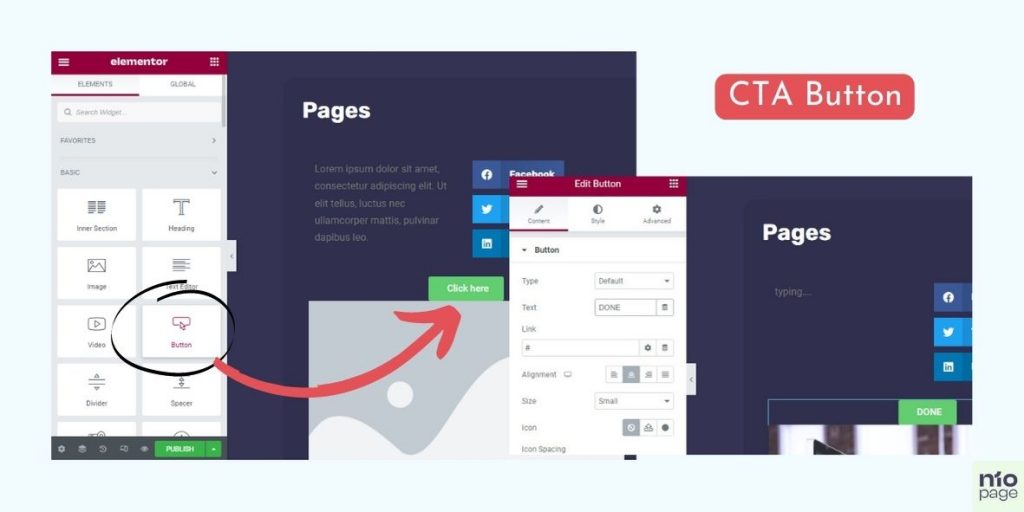
You want to get site visitors to action, of course then use the CTA button.
The principle of setting is the same as with the previous Share button. Find it, drag and drop it.
You also have a variety of options, from what color the button will be, what font it is, what you will write, to which page that button leads to.
We hope this tutorial helps you cope with the setup.
You want to highlight a special price on the site
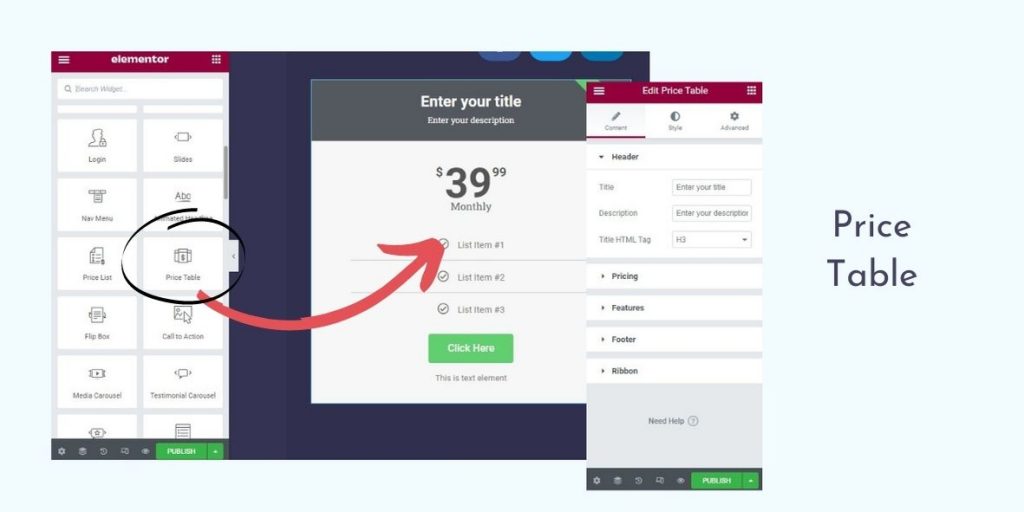
If you want to highlight a special offer on your site, take the Price Table widget. Enter the price of the product, describe the product and service and put a link to the sale of the product or service on the CTA button.
Countdown to the release of a new special offer on the website
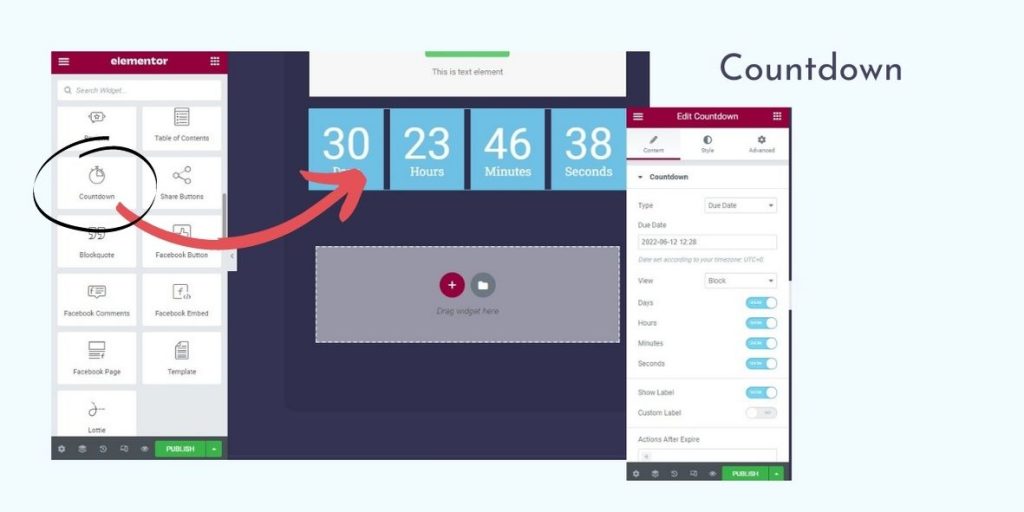
You want to publish an important thing on your website, and that is that your new book, single, cd or some e-book will be published in a day. To offer a discount on your e-book for just a few more days and things like that.
In such situations, use the Countdown widget. You set the time you count down, whether it is days, hours, minutes …
If you want to adjust the color or size of the counter, to customize it to the look of your website then go to the Style option. In Content, you enter content, and in Advance, there are advanced settings for the layout from the position of the widget itself.
And this applies to all previous widgets.